
 Save this
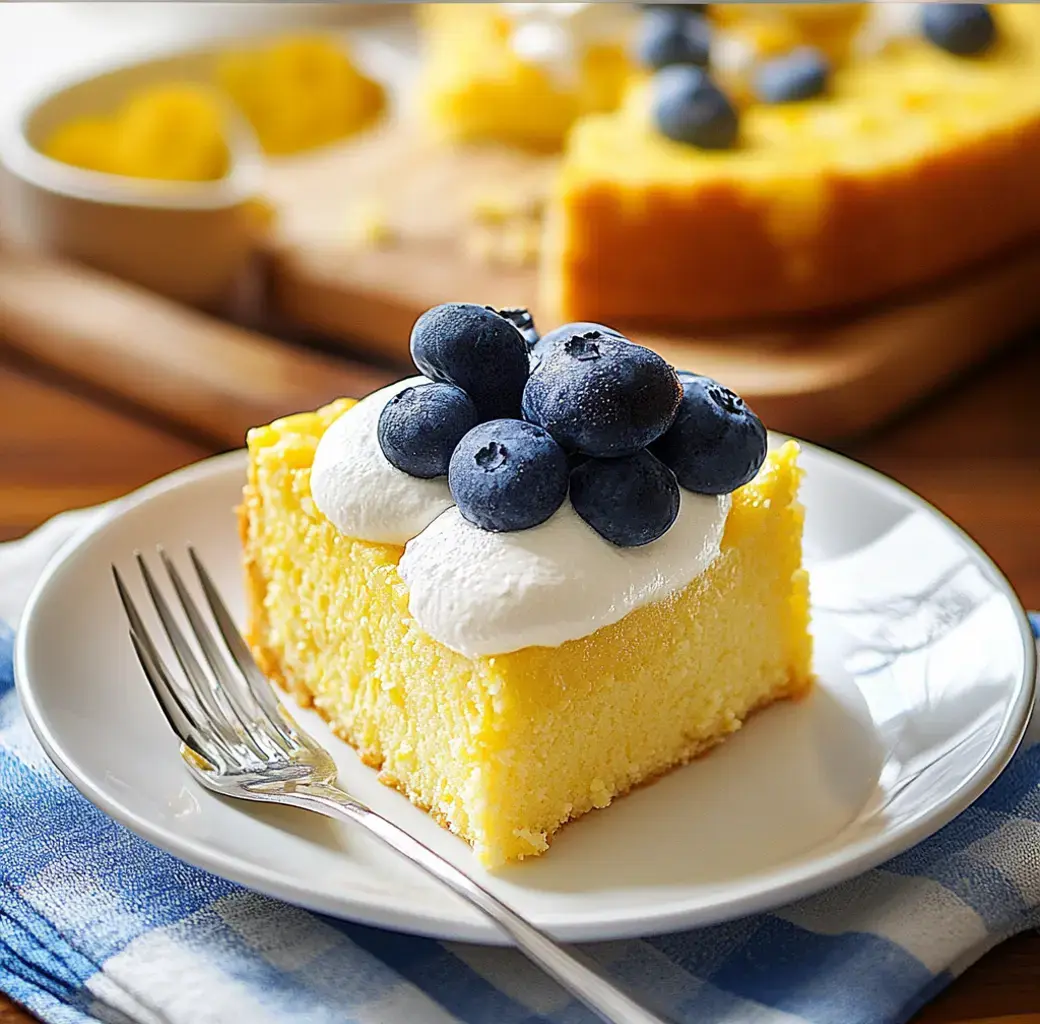
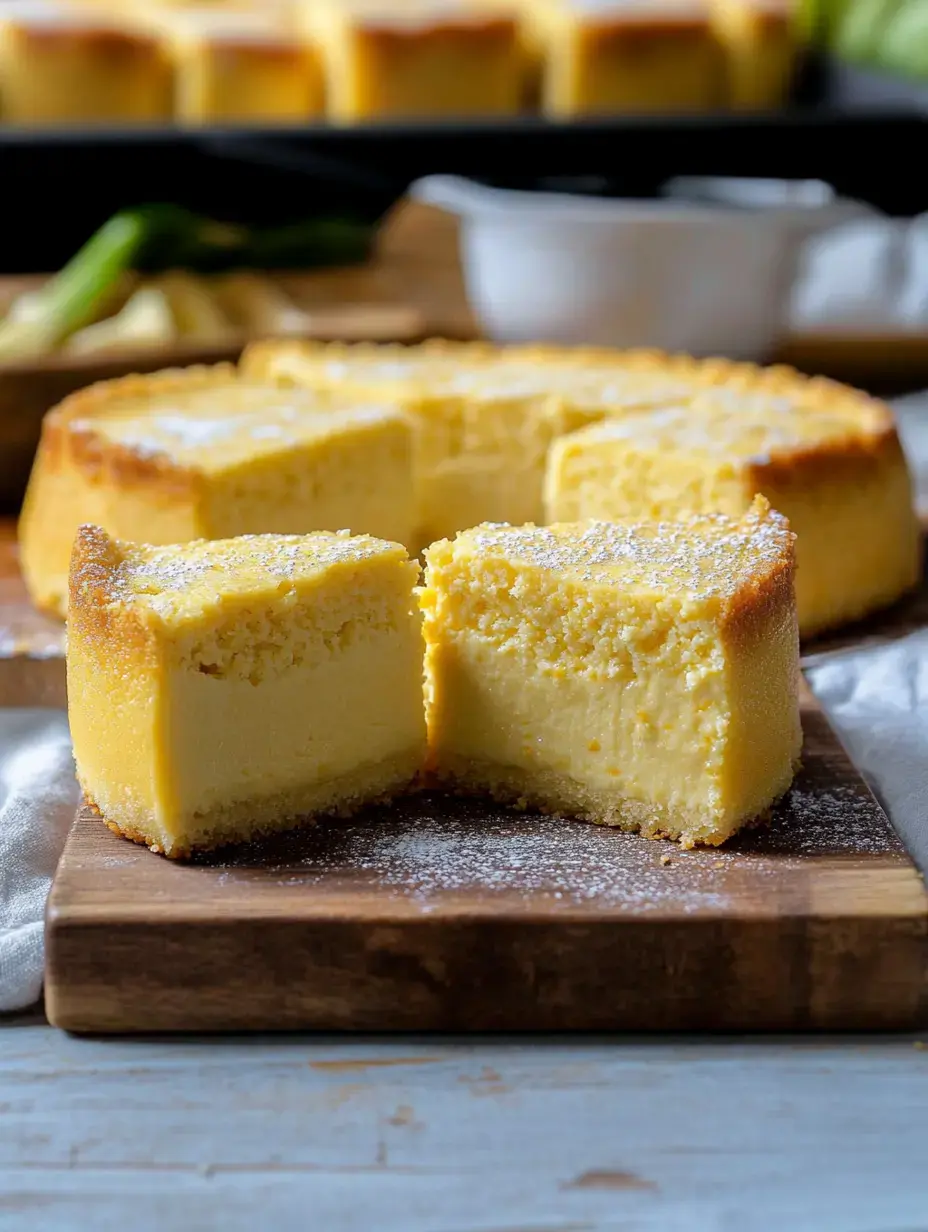
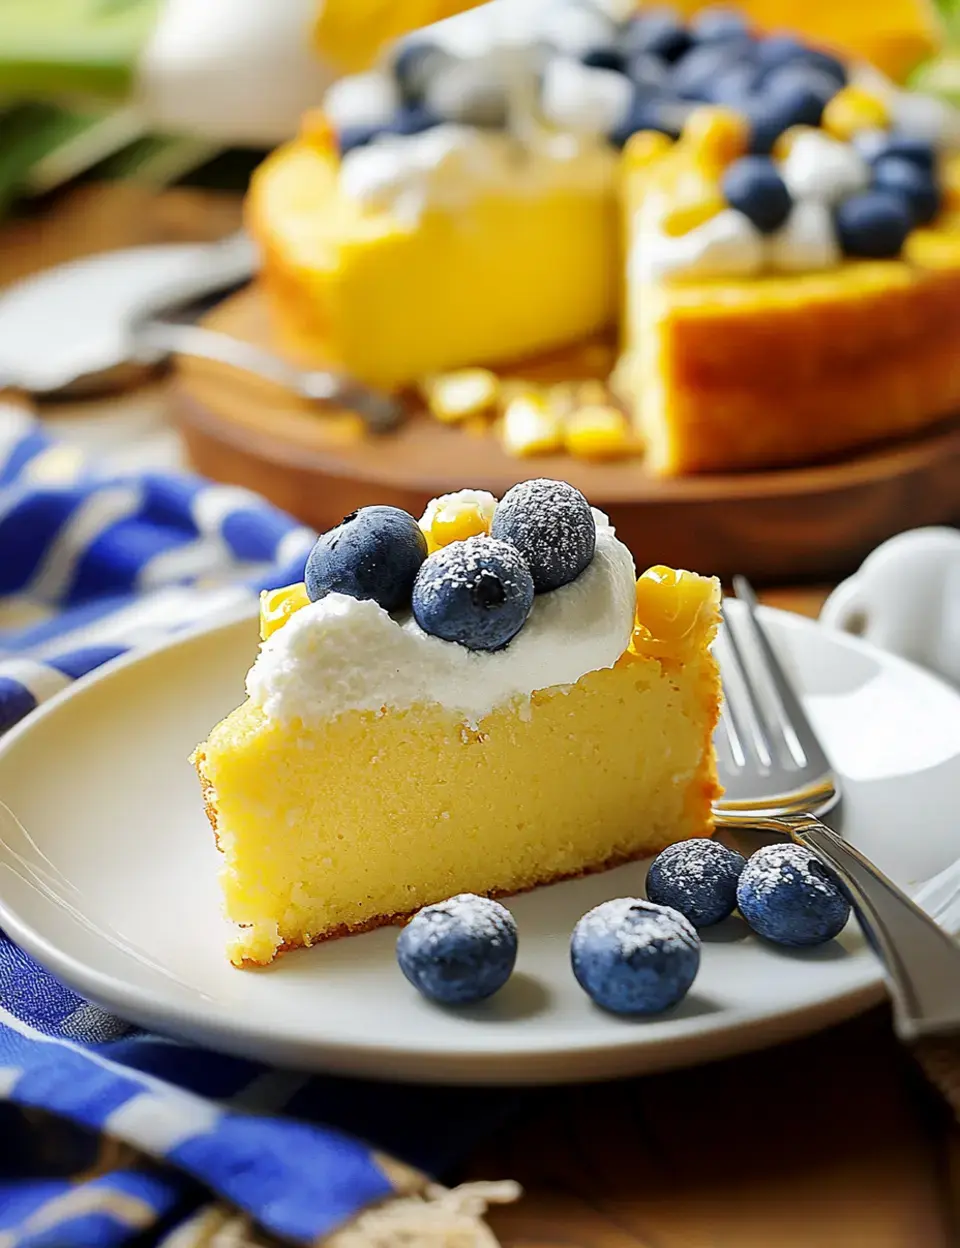
I've gotta tell you about my summer treat find - this unbelievable Magical Layered Corn Custard. I found it when trying to use up some sweet summer corn and now everyone wants the recipe! It's mind-blowing how it splits into three different layers while it bakes, creating something that always wows my guests.
The Surprising Charm
What's really cool about this cake is how it captures corn's summery taste in such a fancy way. Nobody can believe it's made with fresh corn when they try it. The magic happens as it bakes - you get a thick custard layer at the bottom, a velvety middle, and a fluffy cake on top. It's basically three treats all at once!
Your Ingredient List
- Corn: Cut kernels from 2-3 fresh ears for that natural sweetness.
- Whole Milk: 2 cups to make your custard extra smooth.
- Light Cream: 1 cup for that silky-soft texture.
- Melted Butter: 1/4 cup, cooled down before using.
- Eggs: 6 large ones, with whites and yolks split up, whites beaten until they form peaks.
- All-Purpose Flour: 1/2 cup, mixed with other dry stuff.
- Corn Flour: 1/4 cup, ground super fine for subtle corn taste.
- Corn Starch: 1/4 cup, helps create those distinct layers.
- Granulated Sugar: 3/4 cup for just the right sweetness.
- Vanilla Extract: 1 teaspoon to bring all the flavors together.
- Whipped Cream and Blueberries: For topping when you serve it up.
 Save this
Creating The Enchantment
- Set Up Your Dish
- Put two sheets of parchment paper in a 9×9-inch baking dish, leaving some hanging over the sides. Spray with cooking spray.
- Mix It Up
- Throw corn, milk, cream, sugar, and vanilla in a blender and mix until smooth. Add in your egg yolks and the cooled butter, then blend again.
- Filter Your Mix
- Pour everything through a fine strainer into a big bowl and toss out what doesn't go through.
- Work Those Egg Whites
- Whip your egg whites until they stand up in stiff peaks with a mixer or by hand.
- Mix Dry With Wet
- Stir together flour, corn flour, and corn starch in another bowl. Gently add to your liquid mix until just combined.
- Add The Whites
- Very carefully fold your egg whites into the mix a bit at a time, trying to keep as much air in there as possible.
- Cook It
- Pour your mix into the pan and bake at 325°F for about 45–50 minutes until it's set. Let it cool then put it in the fridge.
Insider Tips
After making this cake tons of times, I've learned a few things: always grab the sweetest corn you can find, it really matters. Don't skip the straining step or you won't get that super smooth texture. And take your time with the egg whites - getting them really fluffy is key to getting that perfect top layer.
Switch Things Up
I sometimes throw in a bit of cinnamon for extra flavor or change up the fruits on top based on what's growing. Late summer peaches work amazingly, and even winter cranberries taste great with it. The basic recipe rocks so much you can play around with all kinds of add-ons.
 Save this
Storage Smarts
You can keep this cake in your fridge for about three days but at my place it gets eaten way faster than that! It tastes best when cold with some fresh whipped cream and berries on top. Just know it doesn't do well in the freezer so plan to eat it within a few days.
Kitchen Gear
Even if you're not a baking pro, this isn't as hard as it looks. You'll need a decent blender to get that smooth base and something to whip those egg whites, like a mixer or just a good whisk. That parchment paper hanging over the edges might seem extra but it makes getting the cake out super easy.
What Makes It Special
This cake always gets people talking whether I bring it to a backyard cookout or serve it at a fancy dinner. It's different enough to stand out but still feels like comfort food. And watching those layers form as it bakes? That's just plain kitchen magic!
 Save this
Common Questions
- → How does it form separate layers?
- During baking, the mix naturally sorts itself out by weight, with heavier custard going down and lighter cake parts floating up to make clear layers.
- → What's the point of straining the corn mix?
- It gets rid of tough corn bits and fibers that would mess up the smooth, silky feel of your custard layers.
- → Why should I fold the egg whites gently?
- You need to keep all those tiny air bubbles intact to get the right texture and make sure the layers form properly.
- → Can I use corn from the freezer?
- Go with fresh corn if you can - it tastes way better and frozen stuff often has too much water in it.