
 Save this
I wanna tell you about my go-to method for cooking the champion of beef options. Whenever I cook beef tenderloin, I'm struck by how such basic prep turns into something totally amazing. The trick lies in stepping back and letting this gorgeous cut do its thing with just enough seasoning and watching the temp like a hawk.
Top Shelf Indulgence
For those big moments in life, beef tenderloin stands in a class by itself. I've dished this up at tons of family gatherings and fancy dinners, and it's a winner every single time. That melt-in-your-mouth feel and deep taste makes every nibble feel like you're at a party.
Finding Your Meat
I've made friends with my butcher who always points me to the right piece. Keep an eye out for nice fat running through it and get them to clean it up for you. A properly trimmed tenderloin costs more but man, it's money well spent.
Prep Work
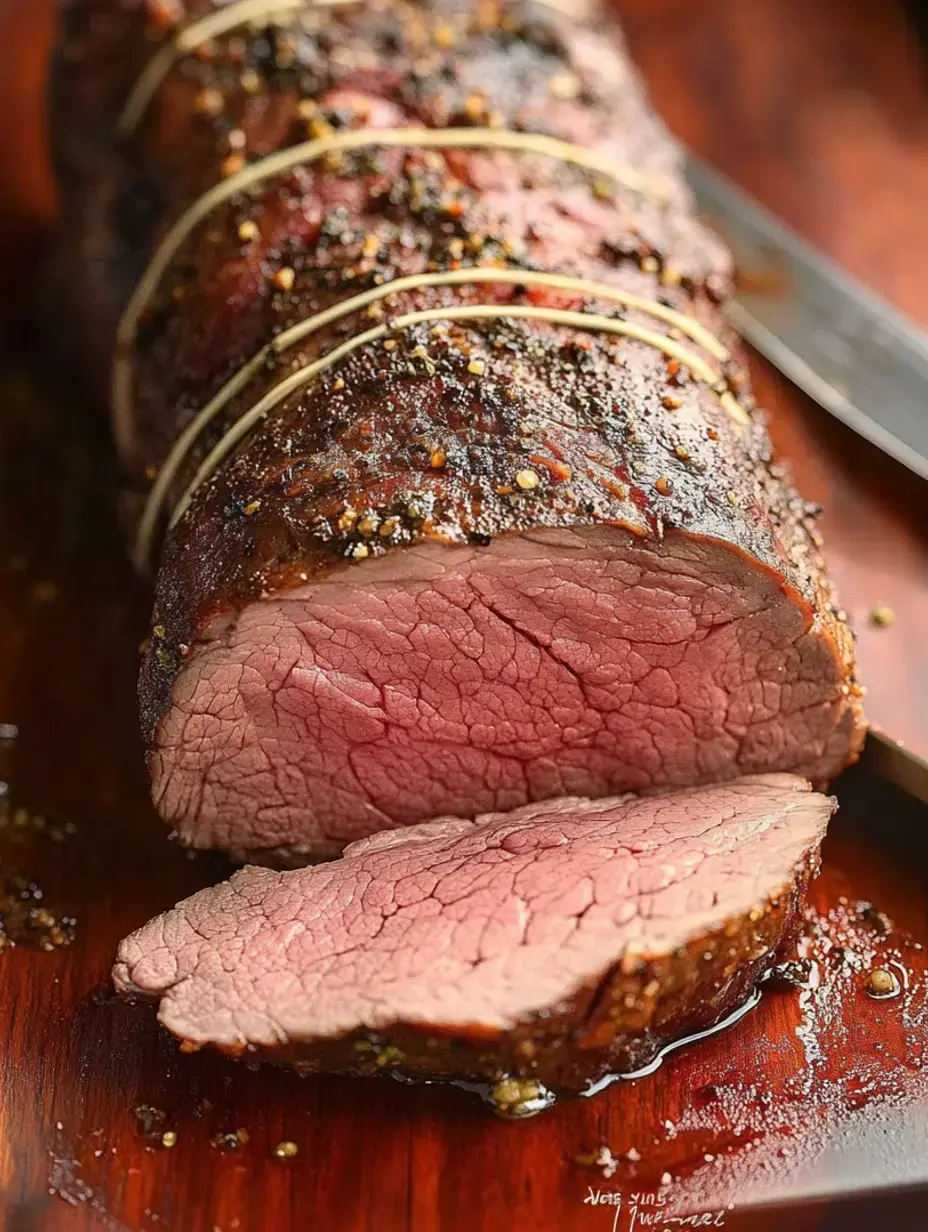
First thing I do is wrap the meat with string about every inch. Might seem like extra work but this really helps it cook the same all over and keeps that nice round look. I really dig how fancy it looks all tied up.
 Save this
Basic Flavors
Through trial and error, I've found that simplicity works best with tenderloin. Some fresh garlic squeezed through my press, a good amount of kosher salt, and freshly cracked black pepper is all that's needed. Let that awesome beef taste take center stage.
Prep For Success
I always cover my pan with foil cause it makes washing up way easier. You can't skip the rack - it lets hot air flow all around the meat so it cooks perfectly on all sides.
Clock Management
That first blast of hot heat makes an awesome crust, then dropping the temp lets it cook slowly to just right. My meat thermometer is super important here - no guesswork, just knowing exactly when to pull it out.
Patience Pays Off
Those 15 minutes of letting it sit might drive you crazy but they matter so much. I cover the meat loosely with foil and use that time to finish my side dishes and call everyone to dinner. The wait makes it taste even better.
Melty Wonder
Dropping some butter chunks while the meat sits is my secret move. The butter slowly turns liquid making these amazing little flavor puddles that make each bite even more decadent.
 Save this
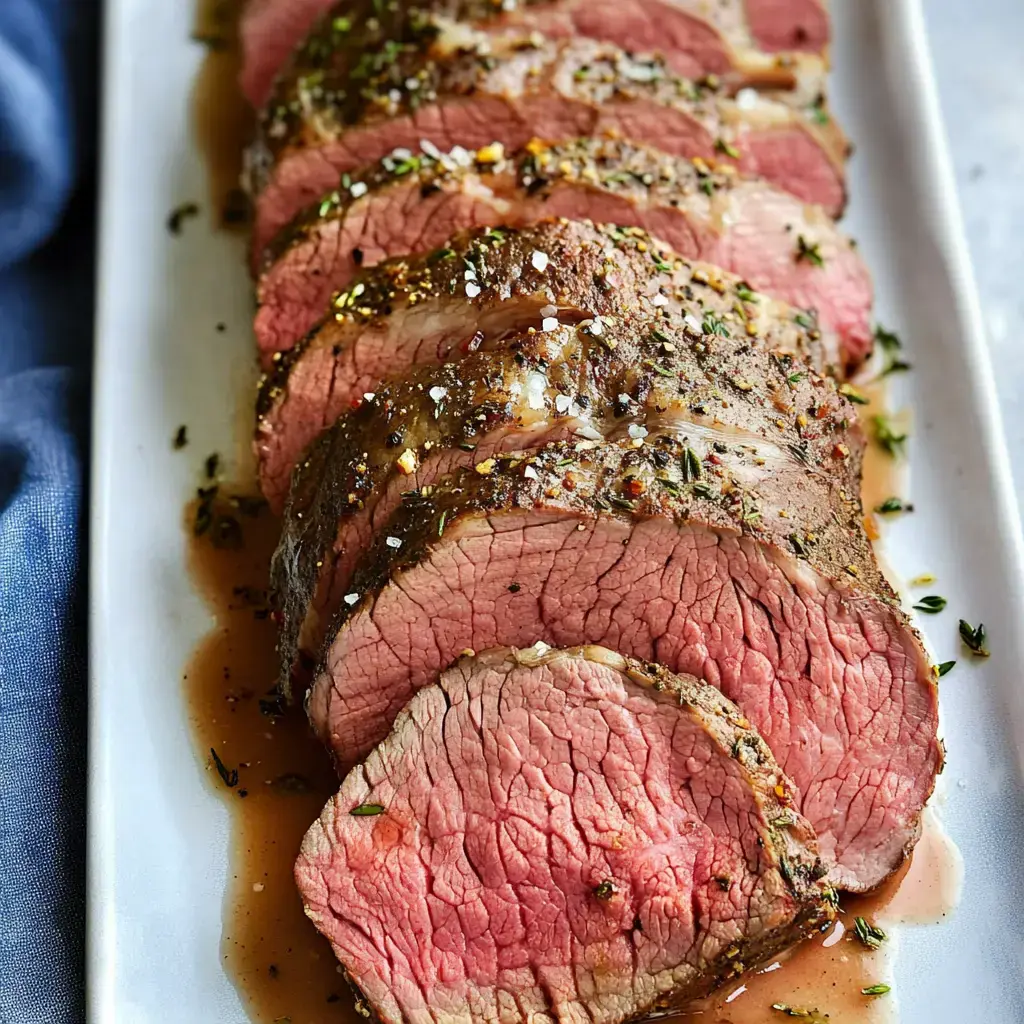
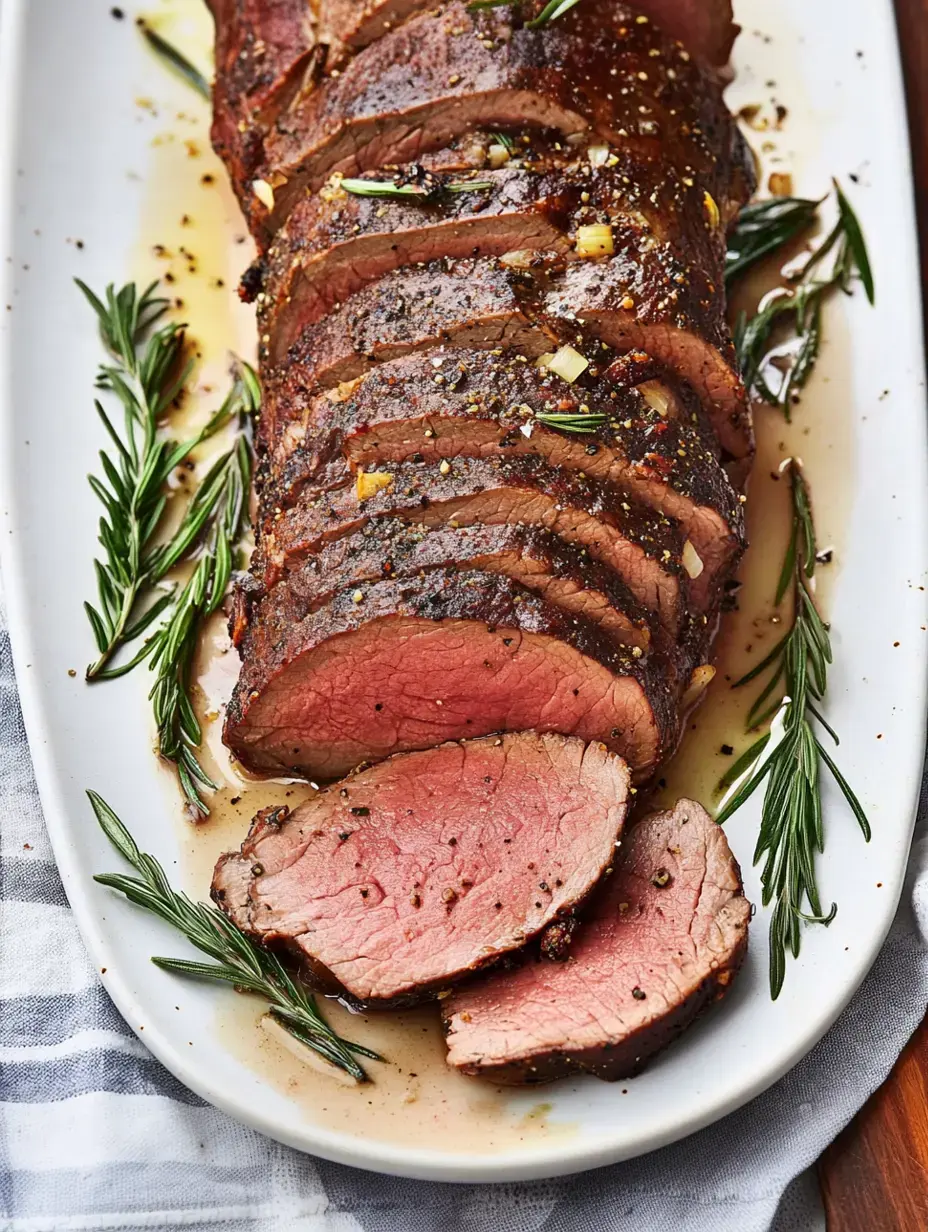
Fancy Serving
The big moment happens with that first cut. I grab my sharpest knife and slice against the grain in thick pieces. When the meat just gives way to the knife, I know I've nailed it.
Great Sidekicks
Nothing makes me smile more than serving this with crispy golden potatoes and bright green veggies. A spoonful of homemade horseradish sauce nearby takes everything up a notch. Those tastes just work so well together.
Drink Pairings
Cracking open a nice bottle of red makes dinner feel extra special. I love how a good Cab brings out all the richness in the beef. It's those perfect matches that turn a meal into something to remember.
Taste Adventures
I sometimes play with different seasonings. A coating of smashed peppercorns tastes amazing and fresh herbs from my garden add such a nice smell. You can try so many things with this cut.
Worth The Wait
That resting time isn't optional in my kitchen. I've learned the hard way that rushing means losing all those tasty juices. Being patient really does make perfect when you're cooking tenderloin.
 Save this
Eye-Catching Display
I try to make this look as tasty as it is. A couple sprigs of fresh herbs tossed around the plate, some roasted veggies arranged carefully. We taste with our eyes first, right?
Leftovers Plan
If we're lucky enough to have extra, I wrap each piece carefully. They make killer sandwiches the next day. But honestly, leftovers rarely happen cause everyone usually wants more.
Nailing It
My meat thermometer is the tool I trust most for this dish. Different sized cuts need different cooking times but hitting that perfect inside temp never fails.
Show-Stopping Moves
When I really want jaws to drop, I'll light up some cognac for a quick sauce right at the table. The way everyone looks when those flames shoot up makes it totally worth it.
Extra Magic
Sometimes I'll soak the tenderloin overnight with fresh herbs and garlic. It's not a must but it adds another level of taste that makes an already fantastic dish even more unforgettable.
 Save this
Common Questions
- → How can I tell when my beef tenderloin is ready?
Grab a meat thermometer for the most accurate results. For medium-rare, look for 130°-135°F, medium needs 135°-140°F, and rare should hit 120°-125°F. Keep in mind the temp will climb about 5 more degrees during rest time.
- → What's the smartest way to keep and warm up extras?
Pop leftovers in a sealed container in your fridge for up to 3 days. When you want them again, wrap the slices in foil and warm them gently at 350°F for 10-15 minutes. Don't get them too hot or they'll dry out.
- → Why should I take off the silverskin?
That silverskin is tough stuff that won't soften no matter how long you cook it. Leave it on and your fancy beef will end up tough and hard to chew.
- → What's the point of tying up the tenderloin?
Tying makes sure your meat cooks evenly by creating uniform thickness. It also keeps that skinny end tucked under so it looks better and doesn't overcook.
- → Can I get the tenderloin ready ahead of time?
You can definitely trim and tie your beef early, but don't add salt until you're ready to cook. Salt pulls moisture from meat, so waiting keeps your tenderloin nice and juicy.
Wrap-Up
Your step-by-step walkthrough for nailing beef tenderloin, from cleaning to cooking temps to insider tricks that'll help you serve up restaurant-quality meat right in your kitchen.