
 Save this
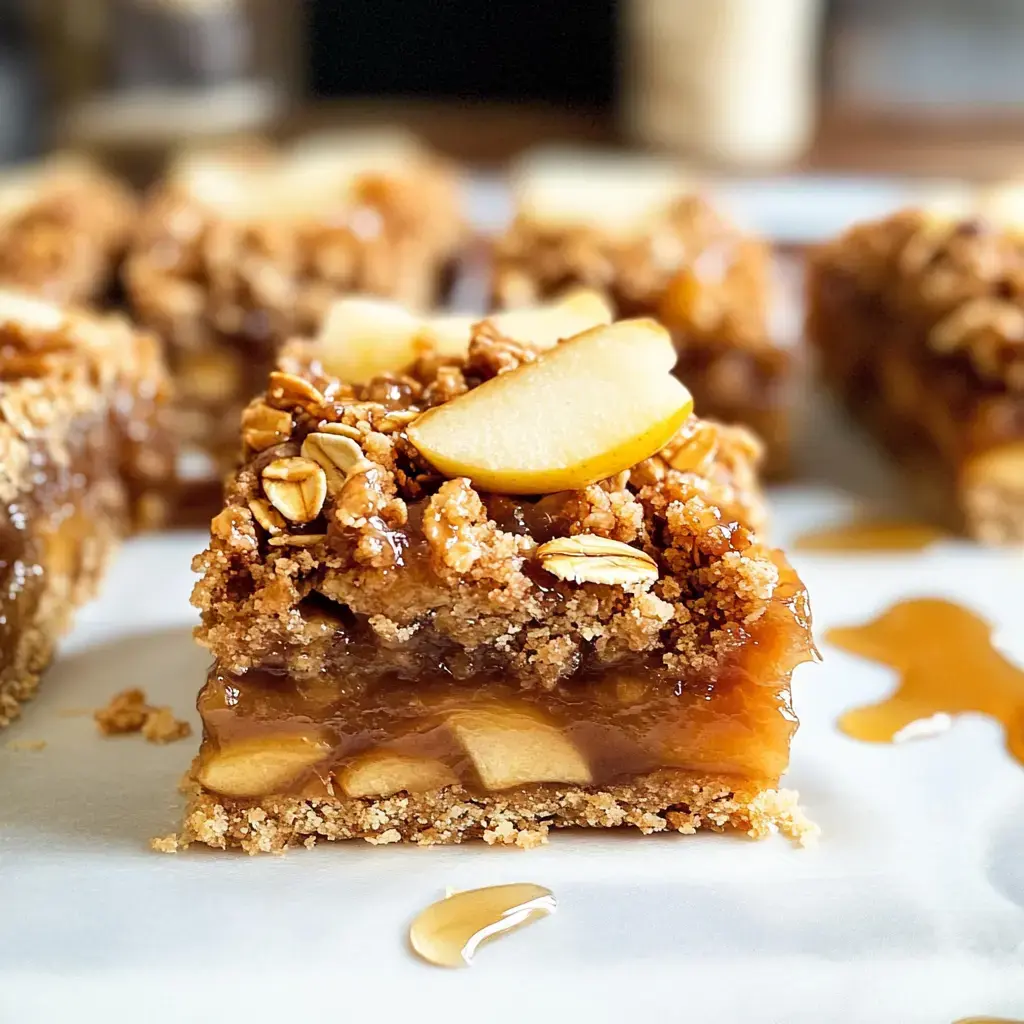
Fall makes me reach for these Caramel Apple Bars when I want something warm and tasty. I love how the soft, spiced apples sit between two buttery oat layers with gooey salted caramel on top. My whole house smells wonderful when I bake them. And guess what? You won't need any fancy mixer to whip these up.
What Makes These Apple Bars Special
I made this for folks who don't have time for complicated apple pie but still want those amazing flavors. The base tastes like oatmeal cookies and adds such nice crunch. That caramel on top really makes everything pop. When I bring these out warm with a scoop of vanilla ice cream, everyone wants more. Now my friends beg me to make these every autumn.
Your Shopping List
- Flour: Any standard all purpose is fine. I've swapped in gluten free blends with good results too.
- Oats: Stick with traditional rolled oats. The quick kind just doesn't give you that chunky, satisfying bite.
- Brown sugar: Either light or dark works fine. I prefer dark for its richer flavor notes.
- Baking soda: A small amount creates just the right consistency.
- Salt: Don't skip this - it makes all the sweet tastes more intense.
- Butter: Go with unsalted, melted down for easy stirring.
- Vanilla: Real vanilla extract makes the base taste incredible.
- Apples: You'll want around 2 1/2 cups after peeling and chopping. Honeycrisp or Granny Smith are my top picks.
- Lemon juice: This stops your apple chunks from browning.
- Sugar: Plain white granulated for the fruit filling.
- Cinnamon: This spice just belongs with apples in fall treats.
- Starch: Helps your filling stay thick instead of watery.
- Salted caramel sauce: You can make this beforehand to cut down on time.
Simple Baking Steps
- Create Your Foundation:
- Combine all dry stuff in a bowl then add the melted butter and vanilla. Set aside 3/4 cup for topping and push the rest into your baking dish. Bake at 350°F until it looks golden, then let it cool down.
- Handle The Fruit:
- Mix your apple chunks with lemon juice, sugar, cinnamon and starch until everything's evenly coated.
- Build Your Dessert:
- Put your apple mixture over the cooled base, add some caramel drops, then scatter that saved crumble mixture on top.
- Into The Oven:
- Bake again at 350°F for around 40 minutes until you see bubbling and golden spots. Cool it completely afterward.
- Finishing Touches:
- Put in freezer for a short time then cut into bars. Add more caramel on top before you serve them.
Insider Baking Tips
Want your bars to turn out amazing? Always cool that bottom layer first, and pick apples that won't turn mushy. The quick freezing before cutting really helps get clean slices. I usually fix my caramel sauce days ahead when I've got spare time.
 Save this
Storage Advice
Store these bars in a sealed container in your fridge and they'll stay good for 3 days. I sometimes pop a square in the microwave when I'm craving something sweet, but they taste just as yummy cold right out of the refrigerator.
Common Questions
- → Can I mix different apple types in this treat?
Absolutely! Try mixing baking apples like Fuji, Honeycrisp, or Granny Smith. Using several kinds makes the flavor and texture even better.
- → What's the best way to keep these squares fresh?
Put them in a sealed container in your fridge for up to 5 days. Heat them slightly before eating to get the best flavor and feel.
- → Can I make these treats before my party?
You can make them 2-3 days early. Keep them cold and add the caramel topping right before you serve them.
- → Why do I need to cool the bars before slicing?
Cooling makes all the layers firmer so you can cut neat squares. Your knife won't get stuck in the caramel and filling this way.
- → Is it okay to freeze these apple treats?
Sure thing, wrap them well and they'll last in the freezer for up to 3 months. Let them thaw in the fridge overnight and warm them a bit before serving.