
 Save this
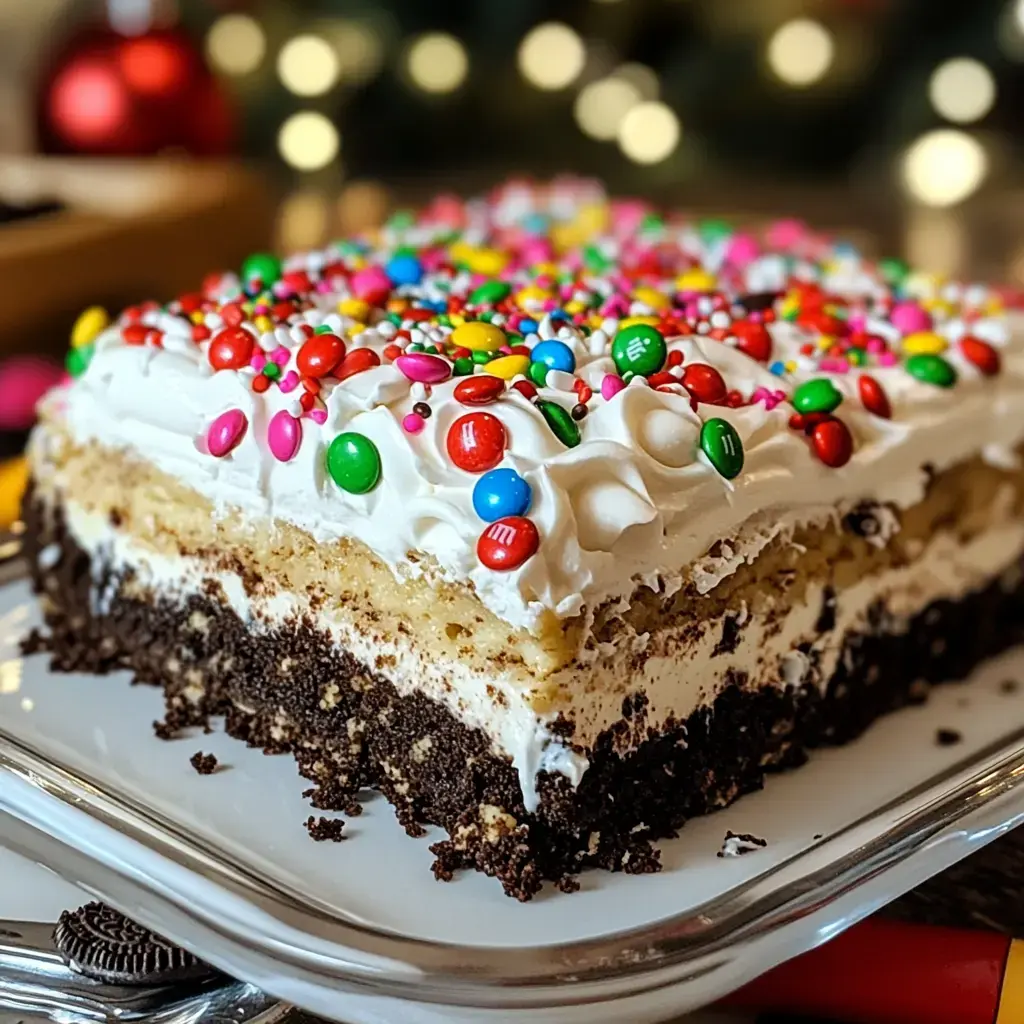
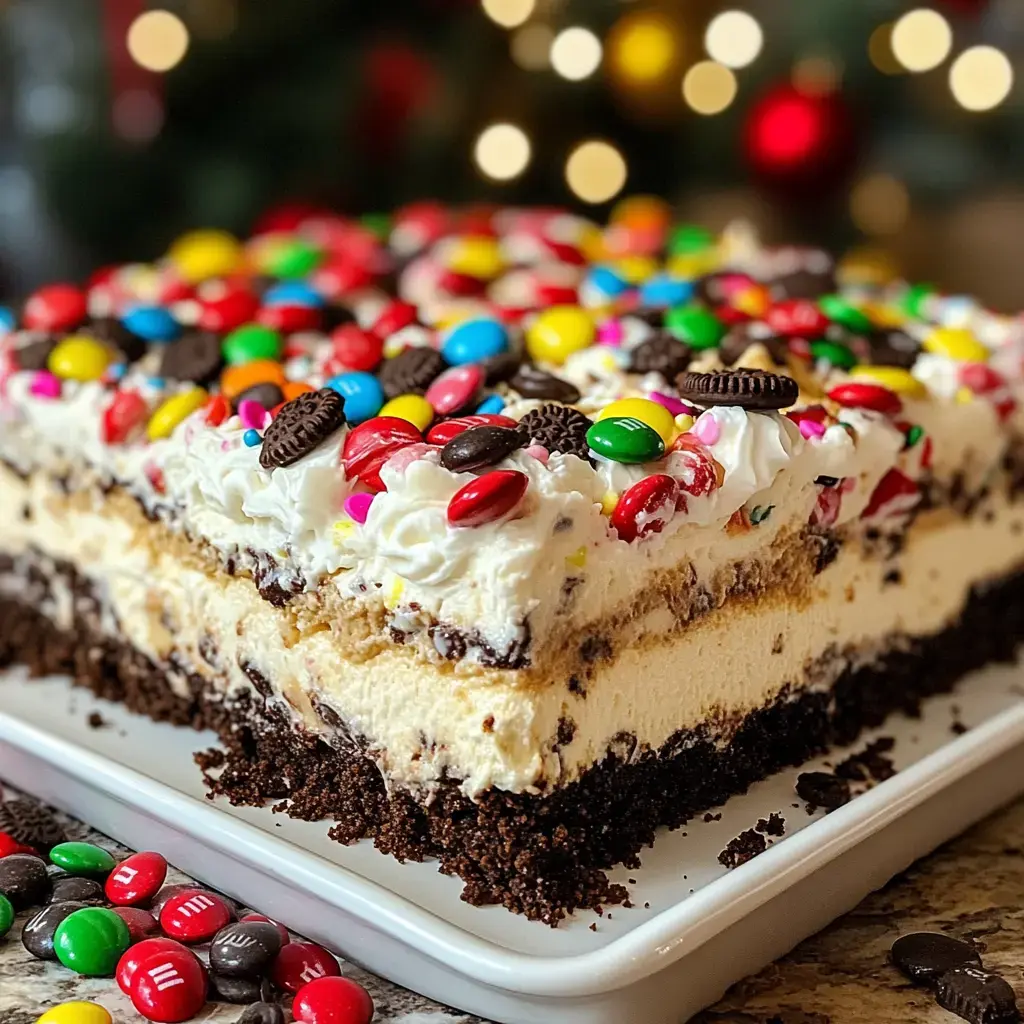
Skip the oven and put together this eye-catching masterpiece with Oreo cookie crumbs at the bottom, a fluffy cream cheese blend, layers of chocolate and vanilla pudding, and lots of fun toppings. It looks awesome on your holiday spread—plus it works just as well for any get-together. You can make it ahead and it's a breeze from start to finish.
What Makes This Sweet Treat Stand Out
If you want something that pops with colorful, creamy layers and crunchy Oreos, this one's a crowd-pleaser. There's no baking to stress about, and you can prep it before the party. Everybody loves how easy it is, and it's as much fun for grownups as it is for kids at the table!
Must-Have Ingredients For Easy Layering
- Topping Goodies: - Whipped topping: 1½ cups (135g) cold from the fridge - Colorful sprinkles: ¼ cup (40g) - Mini M&Ms: ½ cup (100g) - Candy cane bits: ¼ cup (40g), smashed into chunky pieces
- Creamy Layer: - Cream cheese: 8 oz (227g), full-fat and softened to 65°F (18°C) - Sugar: ¼ cup (50g) cane granules - Whole milk: ½ cup (120ml), straight from the fridge (40°F/4°C) - Pure vanilla: 1 teaspoon (5ml) – use the real stuff if you can - Cool whipped topping: 1½ cups (135g), also at 40°F (4°C)
- Pudding Fun: - Chocolate and vanilla instant pudding: 3.4 oz (96g) packs, one each - Cold whole milk: 3 cups (720ml), 35-40°F (2-4°C) - Get your puddings to just barely hold a peak
- Cookie Base: - 36 Oreos (400g), blitzed into tiny crumbs - Butter: ½ cup (113g), melted and set at 165°F (74°C) - Let the mix cool to under 75°F (24°C) before moving on
Simple Delicious Layering Steps
- Chill & Gather Tools
- Keep your kitchen cool, around 68-72°F (20-22°C). Set up a 9x13-inch dish with parchment paper. Have a scale and thermometer handy for best results.
- Put The Toppings On
- Smooth over the last bit of whipped topping into a nice, flat finish. Sprinkle candies, sprinkles, and crushed mints (if using) on top so every slice gets some goodies. Your dessert should hit about 2 inches tall.
- Mix & Spread The Puddings
- Make both pudding mixes separately: whisk each pouch with 1½ cups cold milk for about 2 minutes. Let them sit 5 minutes so they thicken. Spread chocolate first (about half an inch thick), then add the vanilla right on top, keeping everything under 45°F (7°C).
- Make The Cream Cheese Filling
- Whip cream cheese for a few minutes until super smooth. Gradually add the sugar, milk, and vanilla. Mix in whipped topping until it looks even and fluffy. Spread carefully over the cold cookie crust.
- Cookie Crust Magic
- Grind Oreos until they're nice and fine. Stir in melted butter until you get a sand-like texture that sticks when pressed. Press firmly into the pan to make a layer about a quarter inch thick. Let chill for at least 30 minutes at 40°F (4°C).
- Let It Firm Up
- Cover everything with plastic wrap, not letting it touch the top. Pop in the fridge for at least 4 hours at 40°F (4°C). You want clean layers before cutting.
Tricks For Clean Stacking
- Slicing Neatly: - Use a serrated knife warmed to 120°F (49°C) - Clean the blade between slices for sharp lines - Press straight down, don't saw through
- Getting Layers Right: - Let each layer chill for 15 minutes at 40°F (4°C) before adding the next - Smooth with an offset spatula for evenness - Rinse spatula in hot water between uses
- Keep Cool: - Cream cheese should be exactly 65°F (18°C) before mixing - Always keep your dairy ingredients below 40°F (4°C) - Work fast so stuff doesn't get too warm
- Pan Setup: - Use parchment paper with 2-inch overhang on all sides - Be crisp with your parchment folds for sharp corners - Spritz lightly with nonstick spray if you're worried about sticking
Switch Up The Flavors
Want to experiment? Here’s how to swap things out without skipping a beat:
- Drop in ¼ teaspoon (1.25ml) mint extract per layer
- Toss in ½ cup (85g) chopped Andes mints anywhere between the layers
- Add ¼ cup (30g) cold white chocolate shavings on top at 40°F (4°C)
- Try any instant pudding flavor, just stick to the 3.4 oz (96g) pack size
Whatever you add, make sure it's never warmer than 45°F (7°C) when you mix it in.
Common Questions Answered
- Best Way To Get Ahead
- Whip this up 12 to 24 hours before you need it. It’s good in the fridge for up to three days, just keep it at 40°F (4°C).
- How To Freeze
- Wrap tightly with plastic then foil. Leave in the freezer at 0°F (-18°C) for up to a month. Let it thaw in the fridge for a full day at 40°F (4°C) when you’re ready to eat.
- Keeping Layers Sharp
- You want clear, tidy layers: - Bottom: ¼ inch (6mm) cookie - Cream cheese: ½ inch (12mm) - Chocolate and vanilla pudding: ½ inch (12mm) each - Top layer: ¼ inch (6mm) whipped topping
- Swapping Pudding Flavors
- You can pick any pudding you like, just keep to 3.4 oz (96g) per package. Mix each with 1½ cups (360ml) cold milk (keep milk below 40°F/4°C).
- Cutting Made Easy
- Score the top every 3 inches before slicing. Wait until your dessert is chilled to 40-45°F (4-7°C) then cut for the cleanest pieces.
 Save this
Wrapping It Up
Here’s what to look for when it’s done:
- Stands tall between 1¾ and 2 inches (4.5-5cm)
- Best served cold, between 40-45°F (4-7°C)
- Should hold its shape when you slice
- Layers stay separate in both color and texture
- Keeps fresh 3-5 days chilled at 40°F (4°C)
Keep everything chilled as you go and while storing for the best slices and texture.
Common Questions
- → Can I make this ahead?
You bet. It's actually better a day before and still good in the fridge for 3 days.
- → How do I get clean cuts?
Grab a knife, dip it in hot water, slice, then give it a wipe before the next cut.
- → Can I use different pudding flavors?
Absolutely! Switch up the pudding for any flavors you like.
- → How should I transport this?
Keep it in a cooler while you move. Save the fun decorations for when you get there if you can.
- → Why chill between layers?
Let it chill so each layer stays put and doesn't mix together.